How to Create a Hugo site
What is Hugo? Hugo is a general-purpose website framework written in Go. Technically speaking, Hugo is a static site generator. Unlike systems that dynamically build a page with each visitor request, Hugo builds pages when you create or update your content. Since websites are viewed far more often than they are edited, Hugo is designed to provide an optimal viewing experience for your website’s end users and an ideal writing experience for website authors.
This guide will show you how to create a Hugo site.
1. Locate the application
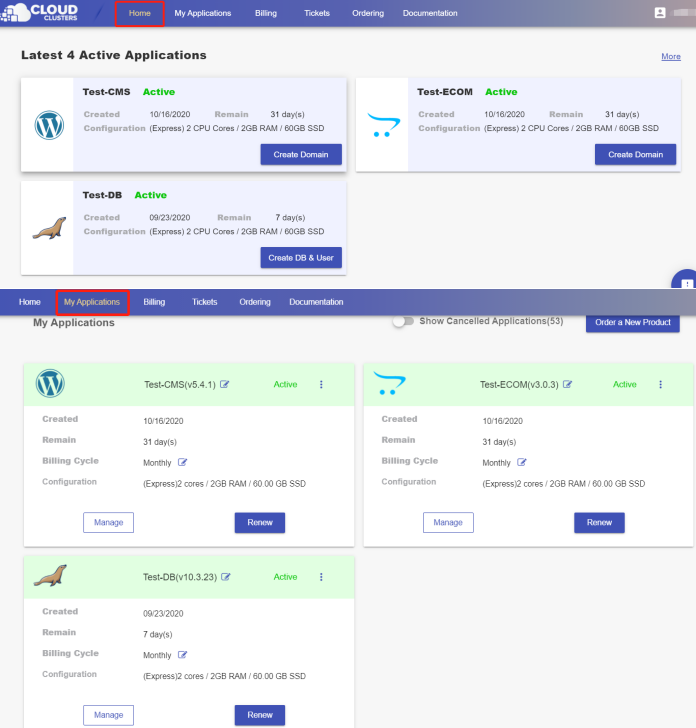
Log in to the Client Panel and locate your target deployment on the Home page or the My Applications page.

2. Navigate to the "Shell / SSH" page
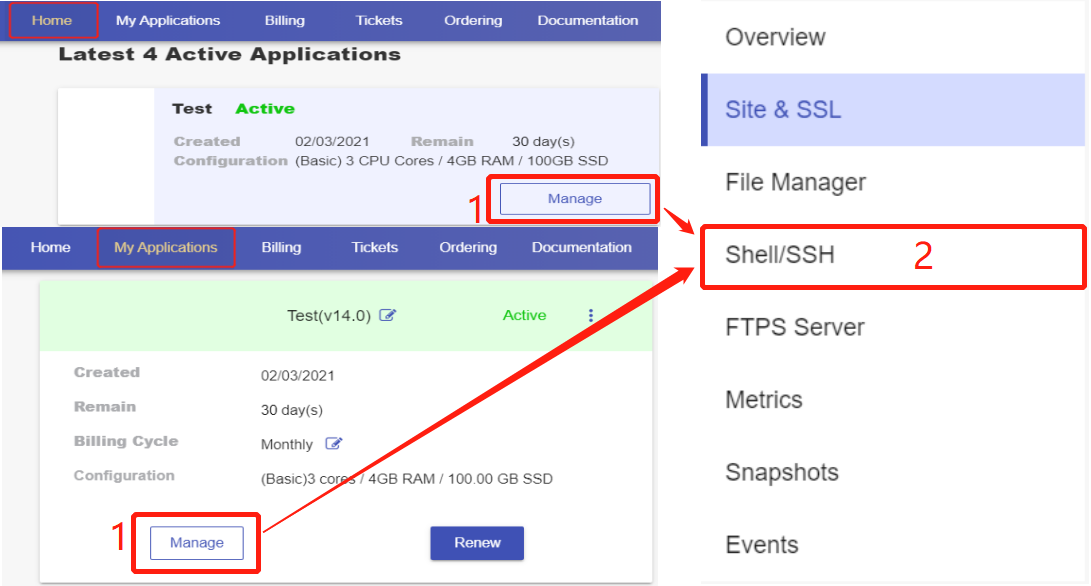
Click the "Manage" button on the Home page or the My Applications page. Then Click the "Shell / SSH" tab in the menu bar.

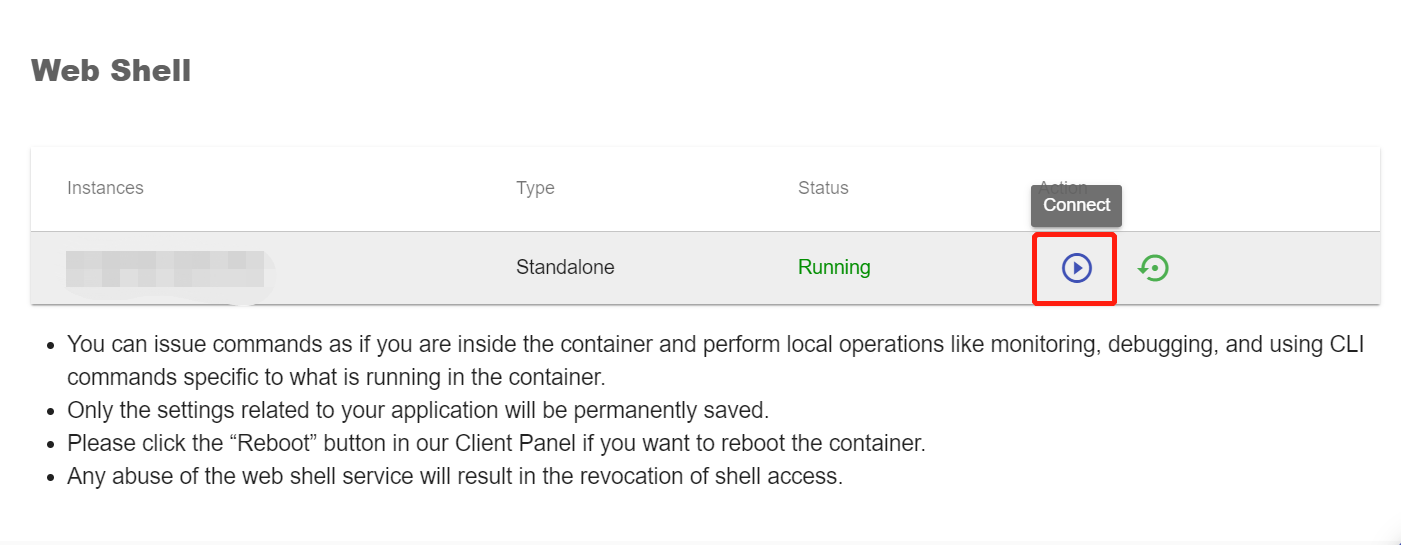
On the Shell / SSH page, you can see a "Connect" button, which is only open to the accounts that has passed our verification process for security reasons. To update your billing account information, please log in to the client panel.

Click the Connect button to initiate a shell session. You can issue commands in it.

3. Create a Hugo site
In CloudClusters hosting, /cloudclusters is the work directory. Run these commands to create a Hugo site with the Ananke theme. The next section provides an explanation of each command.
Enter work directory and create a new hugo site named hugo.
$ cd /cloudclusters
$ hugo new site hugo
Initialize an empty Git repository in the current directory. Clone the Ananke theme into the themes directory, adding it to your project as a Git submodule.
$ git init
$ git submodule add https://github.com/theNewDynamic/gohugo-theme-ananke themes/ananke
Append a line to the site configuration file, indicating the current theme.
$ echo "theme = 'ananke'" >> config.toml
Generate static files to public folder.
$ hugo
4. Add content to Hugo site
Add a new page to your site.
$ hugo new posts/my-first-post.md
Hugo created the file in the content/posts directory. Open the file with your editor.
---
title: "My First Post"
date: 2022-11-20T09:03:20-08:00
draft: true

---
Notice the draft value in the front matter is true. By default, Hugo does not publish draft content when you build the site. Learn more about draft, future, and expired content. Add some markdown to the body of the post, but do not change the draft value.
---
title: "My First Post"
date: 2022-11-20T09:03:20-08:00
draft: true
---
## Introduction

This is **bold** text, and this is *emphasized* text.

Visit the [Hugo](https://gohugo.io) website!
Save the file, then start Hugo’s development server to view the site. You can run either of the following commands to include draft content.
# hugo
View your site at the URL provided in client panel.
4. Configure the site
With your editor, open the site configuration file (config.toml) in the root of your project.
baseURL = 'http://example.org/'
languageCode = 'en-us'
title = 'My New Hugo Site'
theme = 'ananke'
Make the following changes:
- Set the baseURL for your production site. In CloudClusters hosting, leave it as any name.
- Set the languageCode to your language and region.
- Set the title for your production site.
In this step you will publish your site, but you will not deploy it.
When you publish your site, Hugo creates the entire static site in the public directory in the root of your project. This includes the HTML files and assets, such as images, CSS files, and JavaScript files.
When you publish your site, you typically do not want to include draft, future, or expired content. The command is simple.
$ hugo
To learn more about Hugo, Please go to https://gohugo.io/getting-started/quick-start/.